Production Deployment
You've developed locally with the emulator, integrated external dependencies, built sophisticated transactions, implemented comprehensive testing, and created a frontend interface. Now it's time to take your application live and deploy it to Flow's public networks.
This tutorial will guide you through deployment of your Counter application to both testnet and mainnet, which ensures that your contracts and frontend work seamlessly in production environments. You'll learn the essential practices for how to manage live blockchain applications, from security considerations to monitoring and maintenance.
What you'll learn
After you complete this tutorial, you'll be able to:
- Deploy contracts to Flow testnet with proper account setup and funding.
- Configure your application for different network environments (emulator, testnet, mainnet).
- Deploy to mainnet with security best practices and production considerations.
- Update frontend configuration to work with live networks.
- Implement monitoring and maintenance practices for production applications.
- Understand the deployment pipeline from development to production.
Prerequisites:
- Completed all previous tutorials ([Environment Setup], [Smart Contract Interaction], [Building a Frontend App]).
- Counter contract and frontend app working locally.
- Flow CLI installed and configured.
Deploy to testnet
Testnet is Flow's public test network that mirrors mainnet functionality without using real FLOW tokens. It's the perfect environment to test your application in a live blockchain environment before you commit to mainnet deployment.
Understanding Flow networks
Flow has several networks for different purposes:
- Emulator: Local development environment (what you currently use).
- Testnet: Public test network with free test tokens.
- Mainnet: Production network with real Flow tokens.
Each network has its own:
- Access nodes and APIs.
- Account addresses and contract deployments.
- Token economics (free on testnet, real value on mainnet).
Create a testnet account
First, you'll need a testnet account to deploy your contracts. You can create one with the Flow CLI:
_10flow accounts create --network testnet
When prompted:
- Account name: Enter
testnet-account - Select "Testnet" Network
This creates a new account on testnet and adds it to your flow.json configuration. The CLI will show you the account address and save the private key locally.
Fund your testnet account
To deploy contracts and send transactions on testnet, you need Flow tokens. Flow provides a faucet service to get free testnet tokens.
- Visit the Flow Testnet Faucet.
- Enter your testnet account address.
- Complete any required verification (captcha, and so on).
- Request tokens (you'll receive 1000 FLOW tokens).
This command automatically requests tokens from the testnet faucet for your account.
_10flow accounts fund --network testnet testnet-account
Verify funding:
Check your account balance:
_10flow accounts list
You will see your account details with a balance of Flow tokens.
Configure testnet deployment
Update your flow.json to include testnet deployment configuration. The NumberFormatter contract already exists on testnet, so you only need to deploy your Counter contract.
_10flow config add deployment
Follow the prompts:
- Network:
testnet - Account:
testnet-account - Contract:
Counter - Deploy more contracts:
yes - Contract:
NumberFormatter
Your flow.json now includes a testnet deployment section:
_11{_11 "deployments": {_11 "emulator": {_11 "default": ["Counter"],_11 "emulator-account": ["NumberFormatter"]_11 },_11 "testnet": {_11 "testnet-account": ["Counter", "NumberFormatter"]_11 }_11 }_11}
Deploy Counter contract to testnet
Deploy your Counter contract to the public testnet:
_10flow project deploy --network testnet
You will see output similar to:
_10Deploying 2 contracts for accounts: testnet-account_10_10Counter -> 0x9942a81bc6c3c5b7 (d8fe130e5b2212a5c7b3c34fe6e74ede80c750bc4c57e57788e81b247dcd7fe0)_10NumberFormatter -> 0x9942a81bc6c3c5b7 (9a550aeefa5ede62cb95f0549084b2ab7abf3a493cf853d50c1c377a7be733b2)_10_10🎉 All contracts deployed successfully
Test your testnet deployment
Verify your contract works on testnet with this script:
_10flow scripts execute cadence/scripts/GetCounter.cdc --network testnet
You should see:
_10Result: "0"
Test a transaction to increment the counter:
_10flow transactions send cadence/transactions/IncrementCounter.cdc --network testnet --signer testnet-account
Run the script again to verify the increment worked:
_10flow scripts execute cadence/scripts/GetCounter.cdc --network testnet
_10Result: "1"
Perfect! Your Counter contract is now live on testnet and works correctly.
Update frontend for testnet
Now update your Next.js application to connect to testnet instead of the emulator.
Update src/app/layout.tsx:
_27'use client';_27_27import { FlowProvider } from '@onflow/react-sdk';_27import flowJson from '../flow.json';_27_27export default function RootLayout({_27 children,_27}: {_27 children: React.ReactNode;_27}) {_27 return (_27 <html>_27 <body>_27 <FlowProvider_27 config={{_27 accessNodeUrl: 'access.devnet.nodes.onflow.org:9000',_27 flowNetwork: 'testnet',_27 discoveryWallet: ' https://fcl-discovery.onflow.org/testnet/authn',_27 }}_27 flowJson={flowJson}_27 >_27 {children}_27 </FlowProvider>_27 </body>_27 </html>_27 );_27}
Key changes:
accessNodeUrl: changed from localhost to Flow's testnet REST API.flowNetwork: changed from 'emulator' to 'testnet'.discoveryWallet: updated to use testnet wallet discovery.
Test your testnet frontend
Start your frontend application:
_10npm run dev
Visit http://localhost:3000 and you will see:
- Counter value: displays the current count from your testnet contract.
- Connect Wallet: connect with various Flow wallets (not just Dev Wallet).
- Increment functionality: transactions are sent to the live testnet.
- Real transaction costs: small amounts of testnet Flow are used for compute units, the Flow Cadence equivalence of gas.
Important: When you connect your wallet, make sure to:
- Switch your wallet to Testnet network.
- Use an account that has testnet Flow tokens.
- Confirm you're interacting with the correct contract address.
Deploy to mainnet
Mainnet deployment is the final step in your application's journey. Unlike testnet, mainnet uses real Flow tokens and serves real users, so additional security considerations and best practices are essential.
Create a mainnet account
For mainnet, you'll need to acquire Flow tokens through exchanges or other means, as there's no faucet.
Option 1: Use Flow Wallet
- Download and install Flow Wallet.
- Create a new wallet and securely store your recovery phrase.
- Purchase Flow tokens from a supported exchange.
- Transfer tokens to your Flow Wallet.
Option 2: Use Flow CLI
_10flow accounts create --network mainnet
When prompted:
- Account name: Enter
mainnet-account - Select "Mainnet" Network
Acquire FLOW tokens
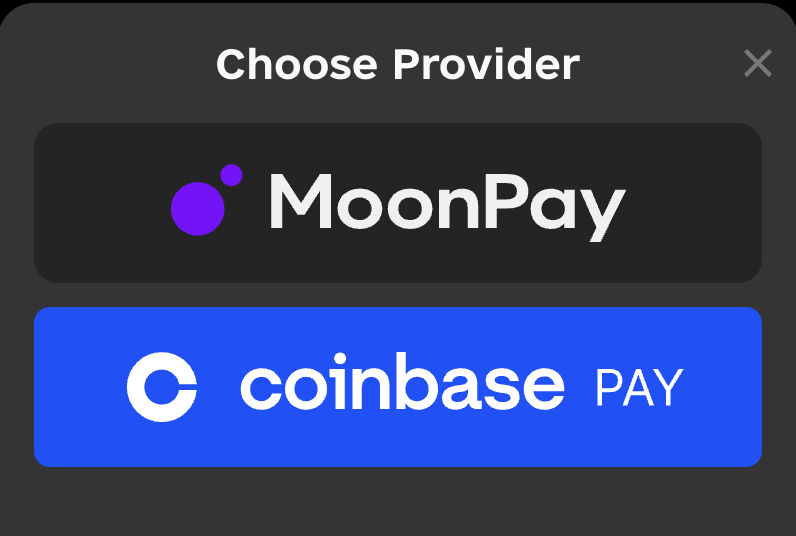
You can purchase Flow tokens from major exchanges like Coinbase, Moonpay, and Binance.
To obtain Flow directly from the Flow Wallet, click "Buy" in your account.
![]()
Then, click on a provider to purchase FLOW.
Configure mainnet deployment
Add mainnet deployment configuration to your flow.json:
_10flow config add deployment --network mainnet
Follow the prompts:
- Network:
mainnet - Account:
mainnet-account - Contract:
Counter - Deploy more contracts:
yes - Contract:
NumberFormatter
Your flow.json will now include mainnet configuration:
_23{_23 "dependencies": {_23 "NumberFormatter": {_23 "source": "testnet://8a4dce54554b225d.NumberFormatter",_23 "aliases": {_23 "mainnet": "1654653399040a61",_23 "testnet": "8a4dce54554b225d"_23 }_23 }_23 },_23 "deployments": {_23 "emulator": {_23 "default": ["Counter"],_23 "emulator-account": ["NumberFormatter"]_23 },_23 "testnet": {_23 "testnet-account": ["Counter", "NumberFormatter"]_23 },_23 "mainnet": {_23 "mainnet-account": ["Counter", "NumberFormatter"]_23 }_23 }_23}
Deploy to mainnet
Deploy your Counter contract to mainnet:
_10flow project deploy --network mainnet
⚠️ Important: This deployment costs real FLOW tokens and you can't undo it.
You will see output similar to:
_10Deploying 2 contracts for accounts: mainnet-account_10_10Counter -> 0xABC123DEF456789 (contract deployed successfully)_10NumberFormatter -> 0x123456789ABC (contract deployed successfully)_10_10🎉 All contracts deployed successfully
Production frontend configuration
Create a production build of your frontend configured for mainnet:
Update src/app/layout.tsx for production:
_27'use client';_27_27import { FlowProvider } from '@onflow/react-sdk';_27import flowJson from '../flow.json';_27_27export default function RootLayout({_27 children,_27}: {_27 children: React.ReactNode;_27}) {_27 return (_27 <html>_27 <body>_27 <FlowProvider_27 config={{_27 accessNodeUrl: 'access.mainnet.nodes.onflow.org:9000',_27 flowNetwork: 'mainnet',_27 discoveryWallet: 'https://fcl-discovery.onflow.org/authn',_27 }}_27 flowJson={flowJson}_27 >_27 {children}_27 </FlowProvider>_27 </body>_27 </html>_27 );_27}
Build your production frontend:
_10npm run build